Turn one seasonal idea into a finished craft without turning the afternoon into a production. Choose the object, check materials and drying time, and prepare a workspace that is simple to reset. Makers can participate by designing, sorting, assembling, observing, or stopping.
Choose a project the afternoon can hold
Each project starts by naming the finished object and how it will be used. That keeps decorative extras from replacing the craft itself. Safety and age notes remain visible on every activity, with flame-free light and adult handling for sharp tools.
Set up a small seasonal making session
- Choose the finished object. Write what you will make and where it will live, be worn, or be given. Keep one project as the anchor.
- Inventory before shopping. List supplies already on hand, then note what must be purchased. Mark tools that require adult supervision.
- Prepare the workspace. Cover the work surface, stage only the materials for this project, and choose a cleanup container before starting.
- Assign optional roles. Offer each maker a choice: select colors, sort pieces, assemble, observe, or stop. Participation can change mid-project.
- Finish and store. Record the drying or curing time, cleanup method, and storage location so the project does not become an unidentified pile.
Scale the project to the maker
- One maker: Use the project brief and keep the cleanup plan beside the materials.
- Family craft: Assign different roles without making one child responsible for another child’s participation.
- Limited supplies: Choose a design that uses materials on hand; test one substitution on scrap before building.
Keep mess and expectations manageable
- Starting without a finish plan: Decide how the finished item will be used before cutting materials.
- Leaving safety notes behind: Keep tool and heat cautions with the page used at the worktable.
- Making every page a must-do: Choose one project per session; the rest are options, not homework.
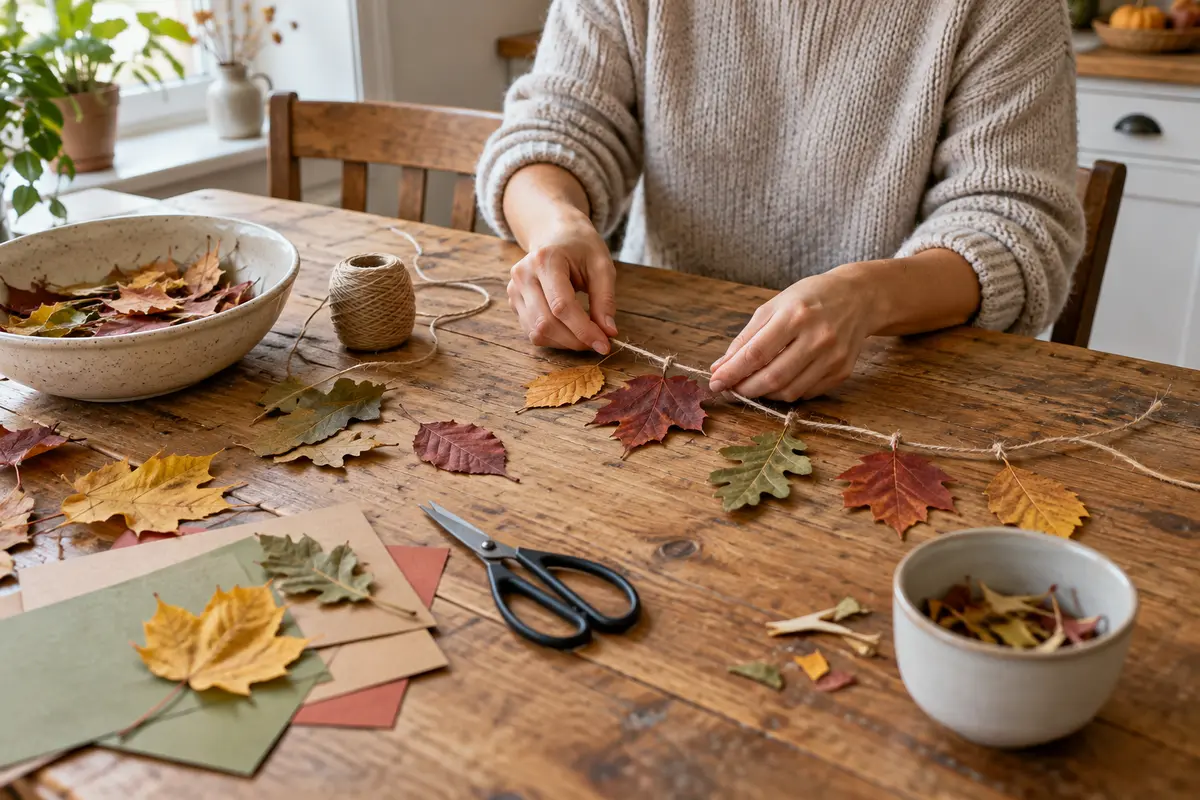
Example: one pressed-leaf garland
A family chooses a pressed-leaf lantern, assigns leaf sorting to one child, panel folding to an adult, and decoration placement to anyone who wants to help. The plan includes a no-glue alternative and a battery LED. The finished lantern is stored flat with the remaining dry materials.
Set up one project for success
Before starting, check instructions for drying, curing, ventilation, age guidance, and cleanup. Put out only needed materials and supervise scissors, hot tools, blades, and small parts as appropriate. Follow hazard labels and consider a safer substitute when a supply has a strong odor or risk.
Make a sample before inviting everyone to build the final version. It shows whether the steps fit the available time and how the material behaves. The sample gives children a choice to copy it, change one feature, or create another design.
Finish, label, and store
Write the maker’s name and date on the back or on a removable tag if they agree. Let adhesives, paint, dough, or coatings dry according to product directions before stacking or wearing the object. Store leftovers in labeled containers away from heat, food, and young children.
Photograph the finished project only with the makers’ agreement. Ask before sharing a child’s image or name online. Note what to change next time, such as fewer steps or a larger work surface.
Fit the project to the time available
Estimate the whole project, including setup, drying, cleanup, and putting the finished item away. If the project cannot be finished in one sitting, decide which materials can be safely stored between sessions and label the next step.
Offer choices that change the result without adding complicated instructions: color, placement, or one decorative element. Children can stop at any point, and the project can be considered complete when the maker says it is.
Use a project brief, not a shopping list
Before gathering supplies, write a four-line brief: what the object is, where it will be used, who may join, and what will count as finished. A specific brief prevents decorative add-ons from expanding the project. For example, “one pressed-leaf window panel for the kitchen, finished when the leaves are arranged and the corners hold” is easier to complete than “make the house feel autumnal.”
Check the materials for drying time, ventilation, clean-up, and age guidance. Follow each product label. If a project requires heat, blades, strong-smelling adhesive, or small pieces, identify the adult who will handle that risk and offer another job to anyone who should not use the tool. Children can design, sort, watch, or stop.
Choose one substitution carefully
Do not assume every material can be swapped one-for-one. A substitute must still work for the object’s purpose. If the original calls for a translucent panel, a thick card may hide the light; if it needs to hold weight, tissue may tear. Test one small sample on scrap before replacing all the materials. If the substitute fails, simplify the design rather than buying a string of new supplies.
A low-mess version can use a tray or shallow box to contain small parts. Keep food and craft materials separate, and put away sharp tools and adhesives as soon as the supervised step ends. Photographing a finished project is optional; ask makers before sharing a child’s work or name.
Close the session completely
Decide before you begin what happens to wet or unfinished work. Label the next step and the date, then store the materials somewhere they can dry safely. If the project is meant to finish today, leave enough time for cleanup and return borrowed surfaces to normal use. A clear stopping point is part of the craft, not an afterthought.
At the end, ask what the maker would change next time. Keep the answer short and practical: larger paper, fewer colors, or a second adult for cutting. That note will help more than a generic supply list when you decide whether to repeat the activity.
A practical sample brief
For a pressed-leaf window panel, define the object as a flat seasonal decoration, choose a cool location away from heat, and prepare translucent paper, dry leaves, and a small amount of adhesive. Test one leaf on scrap first. If the adhesive marks the paper, use a removable corner frame instead. An adult handles cutting; a child may choose placement or watch. The panel is finished when it can hang flat and the leaves stay in place. Cleanup means capping adhesive, returning scissors, and storing any unpressed leaves between dry paper.
This brief focuses on making one manageable object. It is not a catalog of craft ideas or a promise that every material substitution will work.
Keep the materials workable for a real household
Use supplies that are safe for the actual age and ability of the makers. Read labels for adhesive, paint, and sealant, and ventilate as directed. Avoid food containers or surfaces that will later be used for eating unless the product instructions say they are safe after cleaning. Keep scraps and small pieces in a tray so they do not migrate underfoot.
If the finished object is meant to hang, test the attachment on the object’s actual surface before inviting everyone to decorate it. A paper project that needs to last outdoors may need a different material or may be better displayed indoors. Explain those limits before starting so the finished work does not become a disappointing surprise.
Before using a tool with children, show the safe handling once and supervise closely. If a material behaves differently from the example, pause and reassess rather than improvising around a hazard. Finishing later is a reasonable outcome.
Keep a damp cloth nearby for water-based materials, but follow product directions for cleanup and ventilation.